Danh mục tin

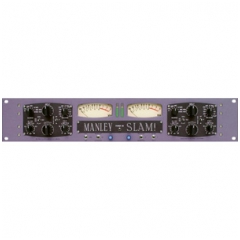
Manley SLAM! Mastering Version
Proudly from our beginning, we at MANLEY LABS have been closely involved with numerous mastering facilities around the world. For these most demanding engineers in our industry, we have created specialised products such as our all-tube tape repro head amps, digital converters, high-powered vacuum tube monitor amplifiers, through to custom monitoring consoles, all the way up to complete facility design and installation.
The Mastering Version of the SLAM! incorporating detented and logable 1/2dB steps built with 1% metal film resistors on sealed gold-contact Grayhill switches is in full production.
You can read on the regular SLAM! page all the particulars about the limiters and the general gist of the SLAM! Keep reading on below for specific info about the Mastering Version of the SLAM!
Differences and Features, yes there are some differences and features:
First off: no microphone preamps. You mastering engineers certainly don't need those.The mic pre and input select switch are removed and the switches become dedicated "mode" switches one each for the ELOP and the FET limiters.
1) The ELOP limiter gets more Ratios - 10:1, 5:1, 3:1, 2:1 and something new called AutoHF which starts off as a 1.5:1 ratio and increases gradually to 10:1 for highs. This is something like a de-esser, and of course can work with the ELOP SC toggle at 200Hz for even more effect.
2) The FET limiters get new modes that are 50%, NORM, LP Lim, BOTH, and CLIP.
The "50%" setting mixes in the straight signal to the limited signal which is often difficult to do in a mastering environment and because the FET sidechain 'reads' off the output, the amount of gain reduction doubles. It resembles halving the FET ratio but is cleaner due to the mix.
The "LP Lim" setting only comes into play for hot signals and reduces the depth of gain reduction for high freqs. This translates to - hot signals + moderate gain reduction = brighter, more present signal, less distortion, more balls. This mode allows more high frequencies to pass through without being limited.
The "CLIP" setting introduces a fixed threshold clipper circuit set up about -2 dB DFS or +18 dBv at the XLR. Within normal usage "CLIP" generally prevents outputs from passing beyond +18 dBv, and 97% of the time, clips in a controlled fast-recovery manner before a converter would (in generally a less than desirable sounding way).
Finally, the "BOTH" setting on the FET limiter engages both the "LP Limit" and the "CLIP" functions at the same time. This might be appropriate for metal and projects demanding intense volume. The "BOTH" mode is designed for situations where extreme processing and loudness is required but where attack, brightness and aggressiveness needs to be preserved or enhanced.
3) The LEFT blue erstwhile-"limit" button becomes a master stereo LIMIT bypass switch here in the Mastering Version. When it is not engaged, it becomes a true hard-wire bypass (This was not possible on the mic preamp regular version obviously).
4) The Right blue button becomes the DAC select switch (stereo).
5) The what-was-the-Phantom toggle on the back of the unit becomes the Unbalanced 1/4" jack input select in this new mastering version.
6) There are no pots on the faceplate of the Mastering Version of the SLAM! All of the knobs in the Mastering Version are discrete detented switches in mostly 1 dB steps, with some appropriate 1/2 dB and 2 dB steps, right where they should be.
More than that, we really like the way it works and sounds and we generally prefer it to the non-mastering version for stereo tracks. There is a lot less fiddling involved to maintain L/R balances and the new modes are subtle but fun. It is easy to make just about anything sound better.
Watch EveAnna show you about the Manley Mastering SLAM! in this video.
MORE INFO ABOUT SLAM! MASTERING VERSION
ADDENDUM FOR SLAM! MASTERING VERSION
The mastering version has a number of changes compared to the regular SLAM!
There are no mic preamps or instrument inputs. Instead the tube sections are paralleled for lower noise and less distortion.
All pots are replaced with rotary switches for detented recallability and easier calibration.
The mastering version has a true hard-wire bypass function, which is not possible on the regular version with mic preamps, etc. Now we have one stereo true hardwire stereo BYPASS button instead separate L & R bypass buttons as found in the regular version.
On the right side we have a button to select the DAC select if the Digital Converter Option was installed – or – enact Limiter Bypass (while keeping the tubes and transformers still active).
There are dedicated unbalanced transformerless inputs on the mastering version. On the back is a switch to select the XLR or 1/4” inputs.
The ELOP® limiter on the Mastering Version has 5 ratios, which may put it into the compressor/ limiter category. The lower ratios may be better suited for complex mixes.
The FET limiter has 5 selectable modes.
We calibrate/build the digital option for +14dBu =DFS rather than +16 dBu.
More about the ELOP® on this Mastering Version: the ratios can be selected for 10:1, 5:1, 3:1, 2:1 and a clever ‘AUTO HF’ mode where high frequencies are limited at a higher ratio while the low freqs are compressed at a lower ratio. This mode is the most gentle. As with most compressors one might need to lower the threshold as one lowers the ratio, if keeping a similar depth of gain reduction is wanted. The threshold markings are based on the 10:1 ratio and a setting of +18 is intended to help reduce DFS overs with a converter with 14 dB of headroom over +4 dBm. Many mastering converters are set for 14 dB of headroom and the +18 setting would be a good starting point. Of course being an Optical-based limiter, it cannot be ultra-fast and some peaks will probably get through and it generally will have the typical (puffy) sound of an optical limiter (because of its inherent time constants). It should be pointed out that much of that character is reduced when used in conjunction with the FET limiter. The FET usually catches some of the overshoots and time/gain behavior of the Vactrol and that can reduce the familiar optical sonic signature.
The FET limiter has some subtle enhancements, some of which will not be apparent on all sessions. In particular, the LP LIM function will not be obvious unless the input signals are rather hot and more than a few dB of limiting is taking place. LP LIM is meant for those jobs that require more drastic treatments. If those conditions are met, 1) the NORM setting may be verging on crunchy and might seem dulled due to reduced transients, 2) the LP LIM setting can be less crunchy, and seem to have more presence because the FET limiter wont be pulling down as much mids and highs as it will lows where most of the energy is. It may also be difficult to compare NORM and LP LIM because the change involves a 3 or 4 second time constant. At normal levels, the two modes will be similar sounding. LP LIM seems to help in extreme cases where loudness is the prime goal. Use the Bypass button to check how much dynamic presence is added.
The 50% setting mixes some raw input with the post limiter signal, which is often difficult in a mastering environment. Because the FET side-chain senses right off the output XLR, one immediate indication is significantly deeper gain reduction shown on the LED ladder, but less apparent limiting to our ears. In some ways, it is like reducing the ratio and threshold, maintaining a similar output level. It may sound a bit more open and may be useful where lower level passages need to be raised without killing all transients. Another benefit is that the raw parallel path flows through less circuitry.
The CLIP setting just introduces a soft clip circuit just below +18 dBv or about a dB shy of where a converter set for +14 of headroom might hit DFS clipping. This could allow one more safety valve with a bit of room for the digital filters to behave nicely. One may follow that process with a digital limiter to lift the level a bit closer to DFS if desired. Read more below about the CLIP settings.
You may notice that the ATTACK switch simulates some of the audible action we associate with attack controls on compressors but still tends to grab most of the fast peaks. In other words, you get some punch with slower attacks. Like other attack controls you may have to adjust the threshold down at slower settings to maintain some clip protection, but may notice that you dont have to adjust the threshold as much as one might expect with a conventional attack control. This is because there is a very fast limiter still hitting transients that are near our threshold of identifying.
Should also point out that the ELOP side-chain filter has some level compensation built in so that chopping off the lows, doesnt cause a huge change in thresholds. There may be some adjustment required depending on the spectral balance of the music though. With bright mixes the 200 Hz may actually cause deeper limiting, plus there is a 3 dB peak above 4K to help smooth excessive sibilance, though we dont refer to it as a de-esser.
The hard-wire bypass function is not quite as trivial as might be expected. It is a bit more complicated because of 2 input jacks, plus the DAC option (no longer available 10/2009) and the 2 different outputs, one of which doubles as an input to the A to D option (no longer available 10/2009), plus all the metering. Selection of either the XLR balanced (transformer) input or 1/4” unbalanced (op-amp) is done with a “pull to toggle” switch on the back panel. Generally either output can be used and there are internal jumpers that allow the XLR output to be used as an input to the A/D (no longer available 10/2009), FET side-chain and OP metering, so that the SLAM! can be used in a wild way with other processors (like a Massive Passive) in a complex chain. Like many of Manley’s processors, using the 1/4” unbalanced output bypasses the final transformer and may be a little cleaner or open sounding compared to the transformer output, which may be a little warmer and richer or evocative of some vintage gear. Might be worth checking out each input and output while you learn the unit. Subtle but important differences.
If the converter option was installed, (no longer available 10/2009), and DAC is selected, it will still be available in bypass. The XLR output will be the same as the dedicated 1/4” DAC output then. The first few units do not pass the DAC to the 1/4” in Bypass (only). It should also be noted that in balanced mode the DAC produces +4 dBm or 0VU @ -14 DFS to the SLAM! circuitry, but in unbalanced mode produces –2 dBm or –6VU @ -14 DFS. This difference might be a flaw or feature, but with the SLAM! being a level changing device, it should not be a problem. The dedicated 1/4” balanced DAC output is –14 DFS = +4 or 0VU. There are a pair of internal trims on the DAC amplifier if a different ‘standard’ than –14 DFS = 0VU or the consumer DFS = 2 volts RMS unbalanced is desired.
A few points inspired by some of the early comments from SLAM! users, make it into this addendum too.
The SLAM! is designed primarily as an old school text book limiter and as such the Output Level knob is not after the final FET limiter. The idea is to set the peak-stop threshold and adjust the incoming level, which is why the level controls are larger. More fun is to be had adjusting the Input and Output Level controls than the Thresholds, which can often just be thought of as set and forget especially if the FET Attack time tends to live in one setting. The Output level is not a gain make-up control typical of a compressor but consider it as another Input level before the FET and after the ELOP...
Some of the skills or habits we have with soft compressors, might be less useful with a limiter. For example, just setting it by ear, with similar input / output levels and an acceptable number of dBs of gain reduction or approaching it as an effect might not get the best results. The approach of trying to achieve a brick wall level and then tweaking how the unit is driven (those Input and Output knobs) usually seems to work best. Put another way, limiters or limiting is not often a great effect in itself, but the increased volume when it is used reasonably can be. So it is about loudness rather than a cool pumping action, or pleasant warmth. It can do some of that, but was designed to be pretty clean for a tubed unit, and hot aggressive colors can be dialed in with the FET limiter.
The LED Gain reduction display is 1 dB per segment. We have seen numerous people at trade shows dial up 15-30 dB of gain reduction presumably to see a good number of LEDs flashing. It is still a limiter and should be treated with some respect of the damage a powerful limiter in the wrong hands can do. In other words, it can be particularly vicious. The worst-case scenario is bass-heavy mixes, fast attack and releases, and deep limiting, where some GR modulation can happen. Though much has been done to allow those very fast releases, which maximize loudness, it does pay to be aware that distortions and edginess might be a side effect. Sometimes the best answer is exactly what many mastering engineers do daily, which is use 2 or 3 compressor/limiters each doing a few dB rather than one doing 10 dB. The LED meters can be very useful in comparing peak levels, especially when used with the Bypass button. Part of the secret to getting the most out of the SLAM!, is to learn the LED meter modes. Everybody has a favorite display mode, but they all are rather useful and you may find yourself changing modes more than expected. Of course, some rely too much on the meters and forget to listen and assume that particular operating levels are important. There is a healthy range of signal levels that are easily accommodated. We only suggest using less limiting for the first few weeks until you are reasonably familiar with the unit. There is a learning curve and no real tricks or settings that seem to be common. Every mix may be different.
Lastly, it is not in any way like the Variable Mu® and was never intended to be. Each has its own purpose and special unique talent. The SLAM! may be easier to describe as a damn-fast transient killing secret weapon, or a tubed, analog L2, or maybe just a serious go-louder box with huge cajones. Enjoy!
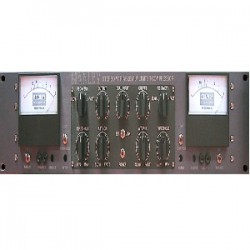
 Rear view of Mastering Digital SLAM! (Digital I/O no longer available 10/2009)
Features and Specifications
- Input Tubes:2 x 12AT7A NOS GE specially selected by Manley Labs for lo-noise and stable bias
- Output Tubes:2 x 6414W NOS USA dual triodes
- I/O:MANLEY transformer coupled Balanced Inputs and Outputs
- Gain:20dB max Limiter Gain
- Input Impedance:
- FET Limiter:Attack: approx. 100μS; Release: 10mS to 2Sec; Ratio: better than 20:1
- ELOP Limiter:Attack: approx. 10mS for 6dB GR; Release: 2.5 Sec; Ratio: 10:1
- Frequency Response:5Hz to 60KHz
- Maximum Output:+32dBm, +30dBm (into 1KΩ load)
- THD+N: Dynamic Range:115dB typical
- Output Impedance:200Ω
- Power Consumption Slam! Analog:
- 0.480 Amps (480 milliamps = 480mA) @ 120V = 57.6 Watts
- 0.240 Amps (240 milliamps = 240mA) @ 240V = 57.6 Watts
- Outboard Power Supply:factory set for 100V, 120V or 220-240VAC operation for original destination country's mains voltage.
- Operating Mains Voltage:changeable with power transformer re-wiring via switch and fuse value change.
- Mains Voltage Frequency:50~ 60Hz
- Size:19” X 12” X 3.5” (occupies 2u)
- Shipping Weight: 25 lbs.
Manufacturer's Suggested Retail Price
- Mastering Version of the SLAM!: $8,600 USD
- Digital I/O Interface option: was $2,500 and is no longer available as of 10/2009
NOTE: The DIGITAL DAC/ADC OPTION for the SLAM! was discontinued 10/2009:

There was a slot in the back for our optional 24 Bit/96KHz Analog to Digital converterand 24 Bit/192KHz Digital to Analog converter card. This allowed one to record directly to the computer or workstation and provided a convenient way to use a digital insert to jump into the analog realm and back. An AES digital input received the stereo digital signal to convert to analog for processing by the SLAM! when the DAC input was selected.Or this killer DAC's Output could be used for monitoring, listening, or to be sent to some other analogprocessors or tape machines.
The digital inputs and outputs were on XLR's for AES/EBU standards and there was also a BNC for Word Clock and Super Clock input. The BNC was added for users' convenience and not just to help the unit's jitter performance. The jitter spec was "Almost Zero" and just about unmeasurable regardless of whether it was locked to its own crystal, the AES input, or the Word/Super Clock. A 7-way rotary switch selected 44.1, 48, 88.2 or 96K, AES IN, Word Clock and Super Clock, for the AES output data rate. Notice we didn't say "sample rate". This ADC and DAC always used the internal 192K sample rate! Truly amazing sample rate converters based on SHARC DSPs were used to almost eliminate (not just reduce) jitter and provided the sonic benefits of 192K sampling, even at 48K or 44.1 data rates. These were very fast exceptional sounding world-class converters. The ADC also had a pair of switches for DITHER and NOISE SHAPING and WORD LENGTH, plus something unusual: a filter select switch. We believed that the manufacturer's choice of filter was one of the biggest differences that affected the sound of a converter, so we gave the user 3 choices, 80K minimal effect, 20K Analog, (a passive filter similar to the 18K on the Massivo), and a 20K Digital FIR for something comparable to other converters. There were also 3 filters on the DAC side set for 20K, 40K gentle, and 80K. All of these were passive and quite subtle and useful. There was a dedicated balanced +4 phone jack output for the DAC, so these could be tube-converters or high end solid state. The ADC was similar, but tube or passive(!) front end, that allowed a mastering EQ to be cleverly used in this chain.
The DAC output was always available. There was even a twisted way (called "Expert Mode") to patch the SLAM! so that one could have the MIC PRE/ELOP feeding an EQ, (or some other thing), returning back to the SLAM! to drive the FET LIMITER, meters, and the A to D converter.
For the mastering version, the digital option was calibrated for +14dBu=DFS rather than +16 dBu.
- DAC:AES 24Bit 192KHz upsampling from 44.1, 48, 88.2, & 96KHz
- A to D:24Bit 96KHz
- Power Consumption Slam! Digital:
0.688 Amps (688 milliamps = 688mA) @ 120V = 82.56 Watts
0.344 Amps (344 milliamps = 344mA) @ 240V = 82.56 Watts - Digital I/O Interface option: was $2,500 and is NO LONGER AVAILABLE 10/2009
-
TECH Notes and Upgrade Information
UPGRADE: MANLEY SLAM! Digital Versions before 1/2006
PURPOSE:To add cooling fans to Manley SLAM Digital Version so the converter board does not overheat.
Serial numbers for units that will benefit from this update are:
SLAM 000-291 that have a "D" suffix which had the factory-installed Digital I/O card installed before 1/1/2006.MMSLAM 000-043D that have a "D" suffix which had the factory-installed Digital I/O card installed before 1/1/2006.
ANALOG ONLY UNITS ARE NOT AFFECTED. ALL DIGITAL SLAMS SHIPPED AFTER 1/1/2006 ALREADY HAVE THE FAN KIT INSTALLED.
For FAN KIT installation procedure, please click here.
TECH NOTES: MANLEY SLAM! Digital Versions
PURPOSE:To replace the Anagram Technologies ADC Module if it has failed due to high heat conditions.
Serial numbers for units that this applies to are: Any serial numbers suffixed by "D" with a failed A to D module.
For module replacement procedure, please click here.
UPGRADE: MANLEY SLAM! ADDING DIGITAL CONVERTERS:
PURPOSE:Add the Anagram Technologies ADC/DAC converters Digital I/O to an analog SLAM!
Serial numbers for units that will benefit from this update are: Any serial numbers suffixed by "A"
To add Digital I/O to your analog SLAM, please click here. NO LONGER AVAILABLE 10/2009
A SLAMMY question about the 'CLIP thing'...
FAQ Question: What's the deal with the CLIP thing on the Release switch and the CLIPand BOTH settings on the Mastering Version SLAM!?
The Slam! Mastering Version includes a mode called "CLIP" on a rotary switchwhere the Input Switch lives on the regular version. This "CLIP" setting isa fixed ceiling that is included to prevent "Overs" or digital clippingthat, in general, is less desirable sound-wise. This clip is set about 0.5dB below digital full scale and is absolutely non-adjustable other than howhard one drives a signal into it. The "CLIP" setting engages two parallelclippers, one in the A to D path and another in the XLR output path afterany transformers. With effort and extreme hot levels one can still reachdigital full scale, mostly due to the effects of severely squaring up asignal and its effect on anti-alias filter ringing plus the fact that whilenon-feedback analog clipping may be somewhat preferable, it is still analogand is not 'perfectly mathematical'.
Besides that mode, there is a mode called "BOTH" which engages both the"CLIP" setting described above plus the "LP LIMIT" mode. "LP LIMIT" is setup for some of the extremely hot pre-compressed tracks a mastering engineergets today. This is a fairly complex setting that watches the input signaland alters the FET limit character once the signal is sufficiently loud.Then it allows the FET limiter to pass a little extra highs and mostly limitlows, thus preventing some of the 'dullness' often occurring with limitersand some of the distortion that can occur with FET limiters in particular(but one of the reasons we like them). Each of these three modes (LP LIMIT,BOTH, CLIP) are intended for the challenge of loud aggressive rock masteringor other situations where a little artistic freedom to shape the sound andpush the 'limits' may be called for. Of course, it all depends on how hardone drives the Slam! and pushes into these circuits so there can be a largerange of effect from virtually transparent to in-your-face craziness. Thesemodes will not suit every task, nor is "CLIP" a magic process thatguarantees a hit - it still requires taste and discretion, and our bestadvice is that a little goes a long way.
OK, on the RELEASE knob of both the regular and mastering versions of theSLAM! is a setting (furthest counter-clockwise) also called CLIP. This is avariable clipper where you are encouraged to adjust the threshold and attackswitch to set up an effect. Essentially it speeds up the timing circuit forthe limiter and the FET is allowed to operate on the waveform rather thanthe envelope of the signal. There is still some shaping of the controlsignal so that it isn't as 'buzzy' as pure clipping. So this clippingcircuit is essentially a bonus effect that can be used to radically treat asignal and probably should be mixed with the straight signal at the console,where one can also EQ both the raw and clipped channels and mix to taste. Weshould point out that the "LINK" switch should not be used and that it wouldbe rare that using say the right signal to clip the left might be useful.This effect is intended for individual tracks where a severe distortioneffect might be cool (like raunchy guitar, synth, or snare) but won't havemuch usefulness on mixes or essentially clean tracks. It seems to works beston sounds that are already somewhat crunchy and where some added nastinessor edge could be fun.
So, there you have it, two or three types of clipping available in themastering SLAM!. Which brings up a good point - 'CLIPPING' is a prettygeneral term for overload distortion where the tops of waveforms are choppedoff because it can't go any higher. Why it is pretty general is becauseevery device seems to have its own signature clip sound, even though simpletheory might suggest much more similarity sound-wise, we know in practicethat this isn't the case and each device has its own overload character.Some distortions are OK for some sounds, some to be avoided at all costs andsome that might be described as magic when you get it set up just right -and there is the big hint - usually the sweet spot is pretty small and itreally is a matter of being fussy with levels and faders to make it workover the distance of a song. You don't have the benefit a guitar player haswith immediate touch and pick force to create the sound, you are probablyworking with recorded tracks or the musician may not be hearing thedistortion effect (it helps if they can) so play those faders to set updrive and return levels throughout the song to really make it work. That'san old trick. Unfortunately, there is some buzz on the net suggesting that"all you need" is some vintage whatever overdriven and you get amazingsounds, like push this button for a platinum record or take this pill forinstant enlightenment. The reality is that it still takes work, musicaltaste and chops. The magic is not only what you use but when and where andthen how you use it.